John's Cedar Kayak
Page Ten: Cockpit, Part 2, & Joining the Hull and Deck
(Click photos for a larger image)
Cockpit, Footbraces, etc.
 I
can almost see the end of the project from here. Another 6 weeks or so of
finishing the outside with final epoxy coats, varnishing, and outfitting the
boat with deck rigging.
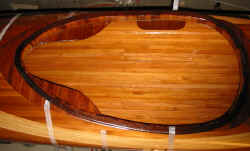
The cockpit is finished. The underside of the combing lip has a fillet of epoxy with wood flour and silica, and the rear of the combing rim has two layers of glass because that area will probably be sat upon and receive rough treatment during wet entries.
The cockpit combing was not easy to glass, with all the curves that the fiberglass must fit around.
The silica in the glue between the walnut strips shows as an off-white in a few places. Would not be noticeable on a light colored wood like ash, but the walnut is so dark that it shows. Oh, well.
 The
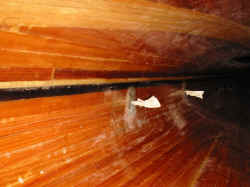
footbrace bolts are being glassed to the inside cockpit wall instead of through the hull -- purely for aesthetic reasons.
I've decided to use Keepers footbraces due to their lower weight (12 ounces vs.
18 ounces for the Yakima braces). Later, I may replace it with cut-down
Yakima footbraces, but they need to be exactly positioned and I won't
know where until my boat is on the water.
I weighed some of
the outfitting pieces and the boat to get ideas on keeping the weight
down. I'll be lifting this boat onto the roof of my car, and carrying it
down to the water, so light is good. Here are the results from my
weighing:
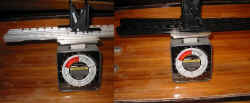
- Footbraces, Yakima 15" rails: 16.7 ounces + 4 bolts = 17.9 ounces (** Good Footbrace **)
- Footbraces, Keepers: 10.5 ounces + 4 bolts = 11.7 ounces (** Much weaker than Yakima -- Not for rolling or surfing **)
- Bulkhead for bow, 4" minicell foam: 9.5 ounces
- Bulkhead for stern, 4" foam: 9 ounces
- Seat, foam shaped to a Guillemot: 8.7 ounces
- Backrest, 4mm okoume plywood (10" x 6") with foam & fittings: 4.0 ounces.
- Deck and hull together, with under-deck hatch rims and 6 ounce glass throughout (2 layers on bottom, cockpit and deck reinforcing, before joining the deck and hull): 34 pounds
Following this weighing, I cut an inch off each bulkhead, which should save about 4 ounces and provide an inch more storage length inside each end.
Hatch Rims
 The
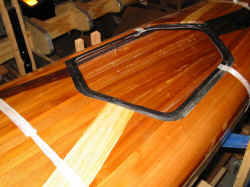
fiberglass and epoxy hatch rims turned out better than expected. There is
a neat channel for the foam sealing tape, and the hatches seat exactly flush.
I'm considering using internal shock cords to hold the hatch cover down. Losing a hatch cover on a highway somewhere would be a problem, so I want the hatch attachment to be very secure with some redundancy.
Joining the Hull and Deck
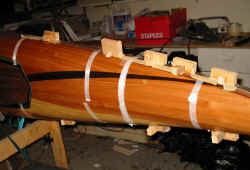
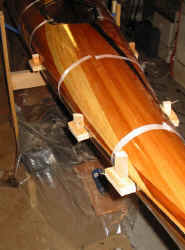 If you've ever picked up clam shell halves
and checked to see if they are from the same
clam, you can get an idea of how I felt when I temporarily taped the halves of my
boat together.
There were a few places near the ends that
were about 1/4" mismatched, but it was not hard to force them together
using tape and some little wedges (a tip I learned from someone on the Kayak
Building Bulletin Board ).
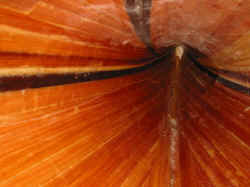
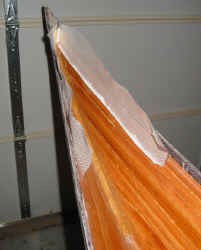 It's
hard to fiberglass the inside seam in the far reaches inside the bow and stern,
so I hot-glued some dry glass tape in the last 18" or so (photo at left) so
I could simply wet it out with epoxy using a brush attached to a stick.
This was another tip I learned from the kayak building bulletin board and it
worked out very well. Highly recommended, because the tape placement is
otherwise very hard to do.
Next Steps
1. Fiberglass tape the outside of the hull-deck seam
2. Make fittings to hold the deck rigging
3. Engineer hatch cover attachments.
Back to Page One
Back to Page Nine
Created: February 18, 2003
