John's Cedar Kayak
Page Six: Fairing
(Click photos for a larger image)
Fairing

 When the boat is finished, the surface should be smooth, with no abrupt
changes in the surface due to irregularities in strips. It takes a lot of
planing and sanding to make the
surfaces smooth.
When the boat is finished, the surface should be smooth, with no abrupt
changes in the surface due to irregularities in strips. It takes a lot of
planing and sanding to make the
surfaces smooth.
A block plane worked well to cut off
the sharper strip edges. Then I used the fairing board with 60 grit paper
to roughly fair the boat.
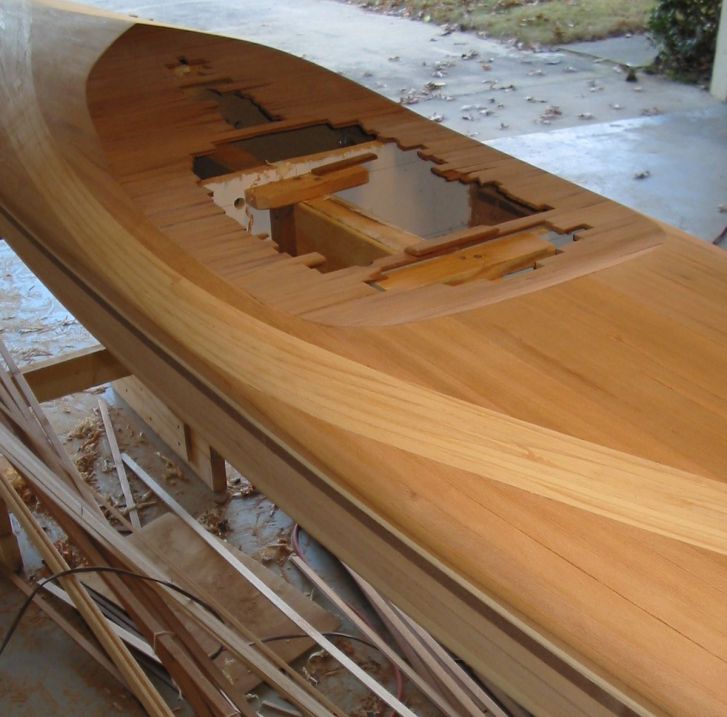 There were a few places on the boat
where a strip was not quite as thick as the others, and it was easier to build up that area with a patch
than to fair the surrounding strips down to that level. I cut some 1/16" and 1/8"
thick strips to lay on top of the low strips. Most of these
areas were less than 1 foot long.
There were a few places on the boat
where a strip was not quite as thick as the others, and it was easier to build up that area with a patch
than to fair the surrounding strips down to that level. I cut some 1/16" and 1/8"
thick strips to lay on top of the low strips. Most of these
areas were less than 1 foot long.
During the fairing process, I wet down the wood surface with a damp rag to highlight areas that needed more work and to raise the grain in bruised wood. The dampness showed glue lines remaining on the boat that I then sanded out. The dampness also brought out the colors in the cedar, providing a hint of the eventual colors in the boat.
Holes and Gaps
After quite a bit of research on hole-filling techniques, my preference is to fill any low spots
with slivers of wood instead of a filler. This should results in the best color
match.
 For small areas where
slivers of wood and patches are impractical, such as staple holes, plain ol'
epoxy will fill it.
For small areas where
slivers of wood and patches are impractical, such as staple holes, plain ol'
epoxy will fill it.
I also mixed some dookie made from epoxy and wood dust. To get the color just right, I added ordinary baking flour to lighten the color. This dookie was applied after first laying a sealer coat of epoxy to the boat. Applying the sealer coat of epoxy over the whole boat allowed it to soak into the boat uniformly so that the places I patch will not show a color difference around in the patch due to different amounts of epoxy soak into the wood.
I am glad that I waited until all the deck stripping was almost complete before mail-ordering epoxy and fiberglass, because it forced me to improve the boat's appearance until the epoxy arrives. If the epoxy were here, I'd be too tempted to stop patching and sanding and simply move on to the glassing.
I want this kayak to look really nice, and I'm sure it will, but a few minor aesthetic flaws are quite acceptable. After all, it is a boat.
Box for Kayaking Gear
I asked fellow DFW
paddlers to vote in a poll to
help me decide what I should make out of my leftover strips. These were the results:
-
Box for kayaking gear: 6 votes
-
Save for next kayak: 4 votes
-
Window sill planter: 2 votes
-
Mailbox: 0 votes
-
Firewood: 0 votes
 So,
I'm building a storage box for
kayaking gear. It
must be long enough to hold a kayak pump, wide enough for a foam paddle
float, large enough for a PFD, have a compartment for a water bottle, sun block and other little things,
be ventilated so wet things will dry out, and fit nicely in the back of my Subaru
Forester.
So,
I'm building a storage box for
kayaking gear. It
must be long enough to hold a kayak pump, wide enough for a foam paddle
float, large enough for a PFD, have a compartment for a water bottle, sun block and other little things,
be ventilated so wet things will dry out, and fit nicely in the back of my Subaru
Forester.
The box will be about 28" inches long, 16" wide, and 13" tall. Here's how the box looks so far:
Next Steps
Epoxying the boat comes next, and
FedEx informs me that my epoxy should be arriving on Friday, December 27. I'm really excited about it
because the true colors of the wood will soon unveil themselves.
Back to Page One
Back to Page Five
Created: December 24, 2002