John's Cedar Kayak
Page Four: Stripping the Deck, Part 1
(Click photos for a
larger image)
Deck Design
 Curved
accent strips that mimic the flow of water around the boat is the idea I want to
create on the deck. A beautiful boat can also be made from simple geometric strip color patterns, but I want
a design that is a little less predictable at first glance. Nature
abhors a straight line.
Curved
accent strips that mimic the flow of water around the boat is the idea I want to
create on the deck. A beautiful boat can also be made from simple geometric strip color patterns, but I want
a design that is a little less predictable at first glance. Nature
abhors a straight line.
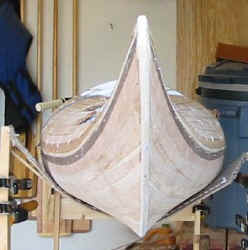
I sketched several designs on paper, and decided on a
pattern similar to one I saw on several boats in internet photos.
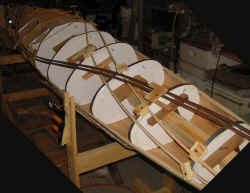
My chosen design has two accent curves, one light (white pine)
and one dark (walnut) that cross on the front deck and again on the rear
deck. The lines vary in width and are asymmetric so care must be taken to
balance the appearance.
 The
accent edge strips were temporarily laid out on the deck, and the positions
marked. Then these strips were removed so I could strip the background
first.
The
accent edge strips were temporarily laid out on the deck, and the positions
marked. Then these strips were removed so I could strip the background
first.
Some experienced boat builders
advised me that I could either strip the curves or the
background first -- either way will work. I
chose to do most of the background first, so there would be less fitting of
individual strip ends.
Background Strips
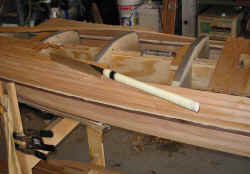 To
minimize the number of staple holes, I tried to do most of the stapling on parts that would be cut
off.
To
minimize the number of staple holes, I tried to do most of the stapling on parts that would be cut
off.
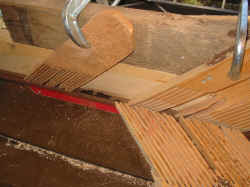
I'm using a Japanese saw to cut the
curves, and it does a really nice job. The
flexible blade always has a few inches of blade into the boat, so it makes
smooth curves.
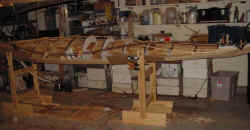
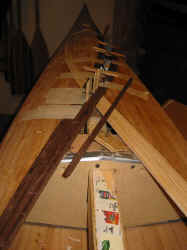
That's an aquarium thermometer on the
strongback in the photo on the right. So far, the lowest temperature in
the garage has been about 52 degrees, and that's fine for building.
 Cutting wood strips,
like I do for this design, does not alter the boat's
strength very much. Most
of the strength in the boat comes from layers of epoxied fiberglass that will
cover the entire exterior and interior. It's called "sandwich
core" construction.
Cutting wood strips,
like I do for this design, does not alter the boat's
strength very much. Most
of the strength in the boat comes from layers of epoxied fiberglass that will
cover the entire exterior and interior. It's called "sandwich
core" construction.
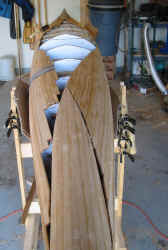
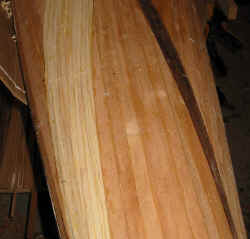
By
the way, here's how the keel strip on the bow turned out (photo at
right). The top of the bow still hadn't been trimmed in this
picture.
The Curves
 Regular
3/4" strips won't bend easily enough to make the curves, even with
steaming, so I decided to rip them into 3/8" strips.
Regular
3/4" strips won't bend easily enough to make the curves, even with
steaming, so I decided to rip them into 3/8" strips.
I'm not using
bead and cove edges on the accent strips so that small slivers can fit together
easily, but I need to be very careful that each strip is the same height as the
others and oriented correctly.
 My
friend Bob stopped by to check out the progress and helped me with a little
experiment: I wanted to find a good mix of dookie to fill in the staple
holes and little gaps (yes, there are a few, but they're small).
My
friend Bob stopped by to check out the progress and helped me with a little
experiment: I wanted to find a good mix of dookie to fill in the staple
holes and little gaps (yes, there are a few, but they're small).
We tried a few different formulas of epoxy mixed with
wood flour, some with white baking flour to lighten the color. Sawdust in epoxy
for some reason is always darker than the original
wood. We also tried straight water-based wood putty.
Based on the test results, I will
definitely will do some hole-filling with putty before epoxying, but I need to
do more testing to consistently color-match the surrounding wood.
 The
Accent Strips
The
Accent Strips
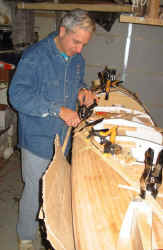
It is a lot of work to bend the pine and walnut strips while keeping the deck
surface fair.
The width of the accents varies, so I sometimes spend
more than 1/2 an hour fitting a single sliver of wood. Now I know why more
builders simply choose to vary the color of wood in a normal stripping pattern
parallel to the keel line or shear.
I'm a little concerned that this stripping
pattern is more difficult than I had planned, but I think it's turning out
well. If I had chosen a simple stripping pattern, I'd be
done with the deck by now!
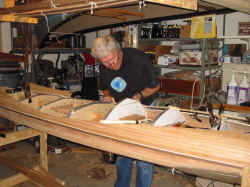
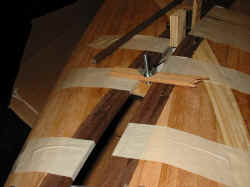
Masking tape works well to hold strips together
until the glue dries. I had been using duct tape, but duck tape is more expensive
and sometimes a little gummy.
 Each piece of wood must be positioned in a way that still results in
a "fair" deck shape. If I mess up the deck, the worst that can happen is
that I tear it off and start it over. That's a nice thing about
building a strip boat.
Each piece of wood must be positioned in a way that still results in
a "fair" deck shape. If I mess up the deck, the worst that can happen is
that I tear it off and start it over. That's a nice thing about
building a strip boat.
Several years ago I built a backyard fence
out of cedar, but this is a little
more exacting!
The next steps will be to finish
stripping the deck, cut the cockpit hole, and then strip a recessed cockpit
area, so the combing will be lower. This will allow me to hold my paddle
lower.
Then comes planing the surface, and
sanding, sanding, sanding.....
Forward to
page 5
Created: December 5, 2002
 Curved
accent strips that mimic the flow of water around the boat is the idea I want to
create on the deck. A beautiful boat can also be made from simple geometric strip color patterns, but I want
a design that is a little less predictable at first glance. Nature
abhors a straight line.
Curved
accent strips that mimic the flow of water around the boat is the idea I want to
create on the deck. A beautiful boat can also be made from simple geometric strip color patterns, but I want
a design that is a little less predictable at first glance. Nature
abhors a straight line.


